FIVE-STAR TEAM WARRANTY &
SAME-DAY SERVICE
How to Inspect & Replace the Thermocouple in Your Furnace
A broken or malfunctioning thermocouple may look like a minor issue, but it can stop your gas furnace from working properly — or worse, compromise your safety and comfort. This tiny metal rod plays an important role in detecting the pilot flame and helping your furnace’s gas valve shut off gas when no flame is present, preventing very dangerous gas leaks and protecting you from carbon monoxide buildup.
In this post, we will explain how to inspect and replace the thermocouple in your furnace, so your heating system in your house stays reliable, efficient, and safe.
What Is a Thermocouple and What Does It Do?
A thermocouple is an important safety component made of two dissimilar metals joined together. When the pilot light flame heats its tip, it generates a small electrical voltage that signals to the gas valve to remain open. If the pilot flame goes out, the voltage stops — and so does the gas flow — preventing unburned natural gas from leaking into your house.
This device is very common in older gas furnaces, water heaters, and gas appliances with a standing pilot light. Newer furnaces often use an electronic ignition or hot surface igniter, but many homes across our country still depend on the gas furnace thermocouple for safe operation.
Signs of a Bad or Malfunctioning Thermocouple
A faulty thermocouple might be the reason your furnace’s pilot light will not stay lit. Look for these common symptoms:
- Pilot stays lit temporarily, then abruptly shuts off
- Pilot will not light at all, despite gas being present
- Furnace does not start, even though other components seem functional
- Burner assembly fails to ignite
- You tested the gas supply, and the valve is open, but it lacks ignition
If you are experiencing these issues, it is the perfect time for furnace repair — and possibly a new thermocouple.
Tools & Safety Precautions
Before inspecting or replacing your furnace’s thermocouple, make sure to follow these key steps:
Tools You Will Need:
- Wrench or adjustable pliers
- Multimeter (for voltage testing)
- Replacement thermocouple
- Screwdriver
- Flashlight
Safety First:
- Turn off electrical power to the furnace at the circuit breaker
- Shut off the main gas line or shutoff-valve
- Let the system cool before beginning the process
- Know potential risks like gas leaks and always follow safety precautions
Step-by-Step Guide to Inspecting Your Thermocouple
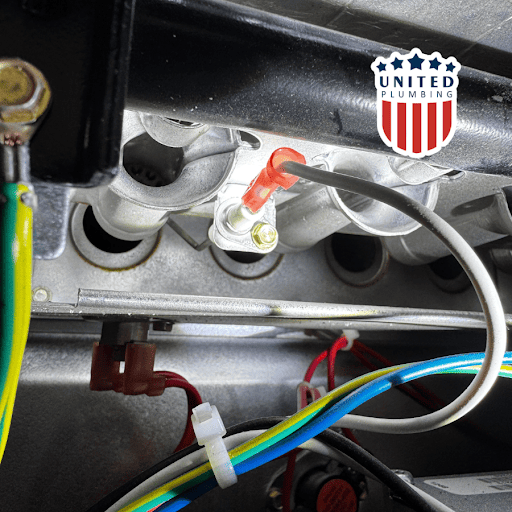
1. Find the Thermocouple
Open any access panels on your home furnace to find the pilot assembly. The thermocouple is a copper tube that connects from the burner assembly to the gas control valve.
2. Visual Inspection
Search for signs of:
- Soot buildup
- Corrosion
- Bent or damaged tips
- Loose connections at the valve
3. Check for Physical Damage
A bent or broken thermocouple can not possibly read the pilot flame. If it is visibly worn out, replacing it is the best option you have.
4. Open Circuit Test
Use a multimeter tool to perform a voltage test. When the tip of the thermocouple is heated by the pilot flame, it should generate 25-30 millivolts. Lower results may point to a bad thermocouple.
How to Replace the Thermocouple
1. Disconnect the Old Thermocouple
Using a wrench tool, carefully disconnect the thermocouple from the pilot assembly and unscrew it from the gas valve.
2. Install the New Thermocouple
Attach the new thermocouple exactly as the old one was positioned before. Make sure that the tip is properly aligned with the pilot light flame.
3. Reconnect and Test
Turn on the gas supply, relight the furnace pilot light, and test the thermocouple by observing for a little bit if the pilot stays lit and the gas flow resumes properly as it should.
Should You Call a Professional?
If the furnace in your house still does not work after replacing the thermocouple, or if you suspect issues with the gas line, pilot gas, or gas regulator, call for professional help from trusted experts.
Licensed HVAC companies, like United HVAC, Plumbing & Electrical can quickly inspect and identify other common causes, like issues with the heat exchanger, electrical current, or bad connection within your furnace’s gas valve. They also have the professional tools to make sure safe operation and protect your Indoor Air Quality.
Cost Considerations
- DIY part: Approximately $10–$30 for a new thermocouple
- Emergency or after-hours heating repair can cost significantly more
Routine furnace maintenance can detect the issues early and avoid the need for emergency repairs later.
Request Service from United HVAC, Plumbing & Electrical
If your furnace pilot light does not stay lit or you need assistance replacing a broken or malfunctioning thermocouple, our team is always ready to serve your needs. With years of experience handling gas heating systems and safety components, we offer trusted, professional and reliable service across California.
We do everything from furnace maintenance and Air Conditioning repair to Sump Pump and water line services — all in your Zip Code and surrounding areas.
Call us today to request service. For fast, professional, and safe furnace repair, United HVAC, Plumbing & Electrical is the name you can trust.

Post views: 671
Frequently Asked Questions
How do I know if my furnace’s thermocouple is broken or malfunctioning?
If your pilot light keeps going out or does not stay lit even after relighting, there’s a very high chance that your thermocouple is faulty. Other signs might include the furnace not turning on or lack of gas flow despite the valve being open.
Can I replace a thermocouple myself, or should I call a professional electrician to fix the problem?
Yes, replacing a thermocouple could be a DIY job if you are ok working around gas appliances and follow mandatory safety precautions. However, if you are not confident in your abilities or the issue persists after replacement, it is better to to call a licensed HVAC technician.
How much does it cost to replace a furnace thermocouple?
The part itself is not expensive and should typically cost between $10 and $30, but professional replacement might cost you from $149 to $249 depending on your location and service fees. Emergency service may cost more.
What tools do I need to inspect and replace a thermocouple?
You need a wrench or adjustable pliers, screwdriver, flashlight, multimeter, and a replacement thermocouple. Always shut off the gas and power before starting the job for safety.
What happens if I ignore a faulty thermocouple?
Ignoring a broken or malfunctioning thermocouple can lead to your furnace not working at all or, worse, a potential dangerous gas leak. Since the thermocouple acts as a safety device to prevent unburned gas from leaking into your home, a malfunction could compromise your safety and comfort.
Latest posts
")
Why Does My Drain Keep Gurgling? (Causes, Costs & When to Fix It)
You’re standing at the sink and suddenly hear a strange gurgling noise from the drain. It might seem harmless at...

Hydro Jetting vs Drain Snaking: Which Is Better for Clogged Pipes?
A clogged drain is frustrating enough. But when the clog keeps coming back, it usually means something deeper is...
If you still have questions or need advice, please leave a request and we will contact you as soon as possible
Need a plumber and got no clue where to start?
(408) 539-6936Facing a plumbing issue? Get a FREE in-person estimate and quick solutions from our skilled technicians, ensuring your home runs smoothly again!