How to turn on the gas water heater pilot light – a step-by-step guide
Are you having trouble lighting the pilot light on your gas water heater in San Jose? No need to worry! With the appropriate tools and knowledge, this is a frequent problem that can be resolved effortlessly.
In this tutorial, we will guide you through the process of lighting the pilot light on your gas water heater.
Precautions Before Turning On the Pilot Light
To ensure your safety, there are several precautions you should take before proceeding.
Check for gas leaks: It’s important to check for gas leaks before attempting to light the pilot light. Use a gas leak detector or a solution of soapy water around the gas connections to check for leaks. If you detect a gas leak, do not proceed and contact a professional plumber immediately.
Ventilate the area: Gas appliances require proper ventilation to prevent the buildup of carbon monoxide, which is a toxic gas. Ensure that the area is well-ventilated before attempting to light the pilot light.
Read the manufacturer’s instructions: Before turning on the pilot light, carefully read the manufacturer’s instructions for your specific gas water heater model.
Steps to Turn On the Pilot Light
After taking all the necessary precautions, you can follow these steps to turn on the pilot light:
1. Make sure your gas valve is on
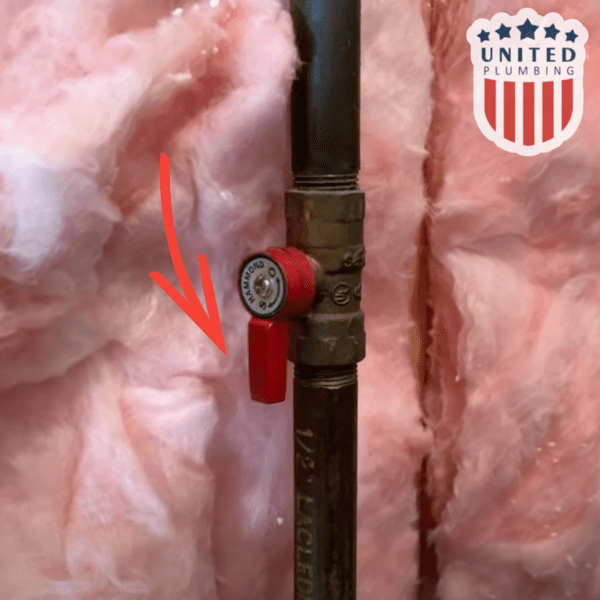
2. Locate the gas control valve – Typically situated near the bottom of your water heater, the gas control valve should be turned off before proceeding.
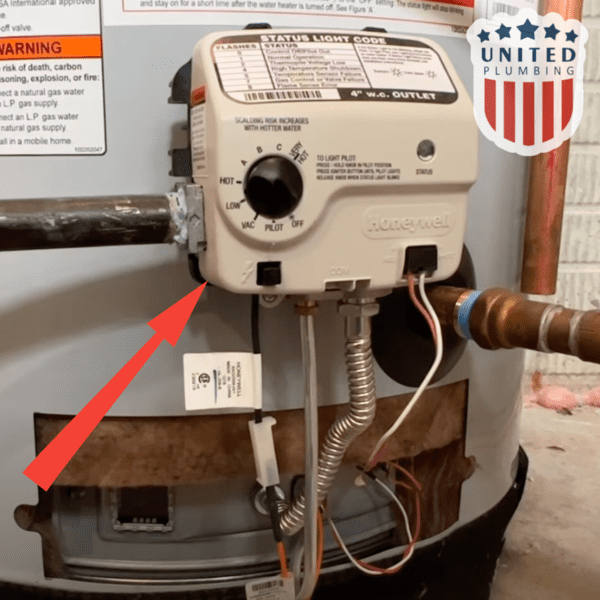
3. Wait for gas fumes to disperse – Allow approximately 5-10 minutes for any gas fumes to disperse before moving on to the following step.
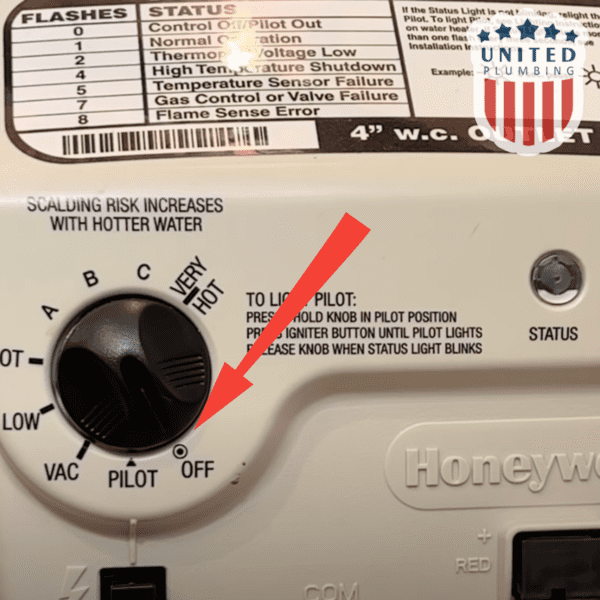
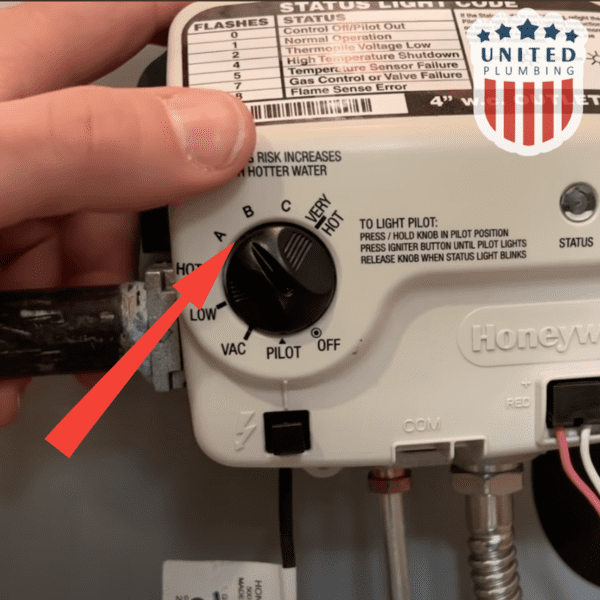
4. Locate the pilot light assembly – The pilot light assembly is usually located near the gas control valve. It has a small knob labeled “pilot” and a red button.
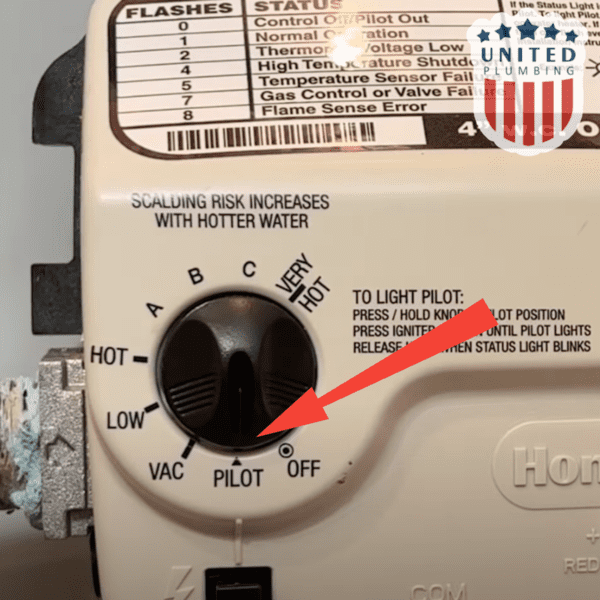
5. To turn the gas water heater pilot light on, turn the knob to the “pilot” position. Then, press and hold down the red button.
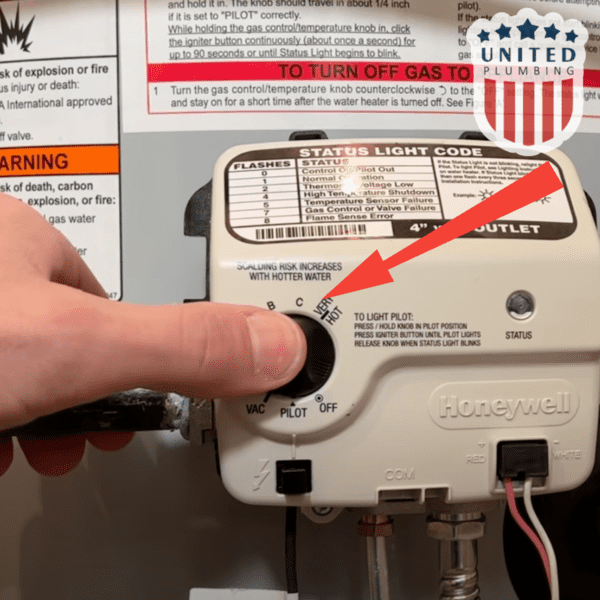
6. Light the pilot light – Use a long match or a lighter to light the pilot light. Hold the flame to the pilot light assembly while continuing to press down on the red button.
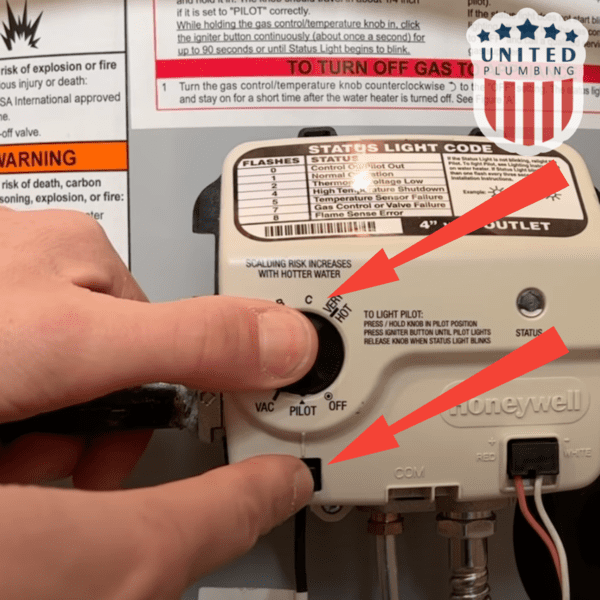
7. Wait for the pilot light to ignite – Continue to hold the red button down for about 30 seconds after lighting the pilot light. This allows the thermocouple to heat up and send a signal to the gas valve that it’s safe to turn on the burner.
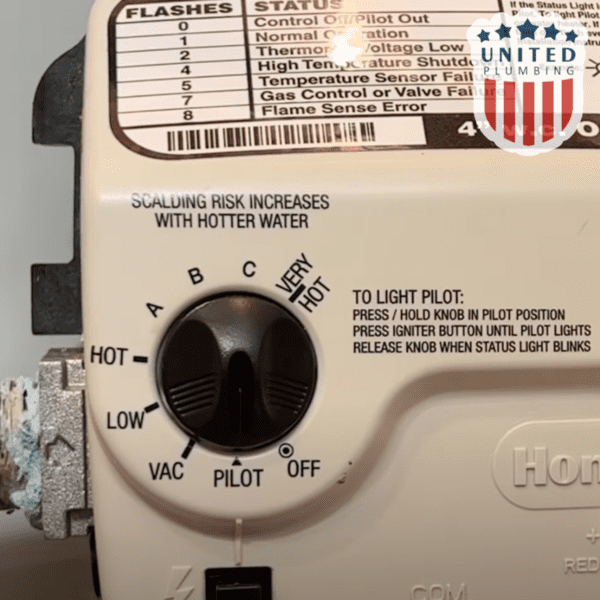
8. After lighting the pilot light, turn the gas control valve to the “on” position.
Common Problems and Solutions
If you’ve followed these steps and the pilot light still won’t stay lit, there may be an underlying issue.
Here are some common problems and solutions:
Dirty pilot light orifice: As time passes, the pilot light orifice can accumulate dirt and debris, which can make it challenging to light the pilot light. To resolve this issue, you can use a needle or a thin wire to clean out the orifice.
Faulty thermocouple: The thermocouple is a safety device that senses when the pilot light is lit and signals the gas valve to open. If the thermocouple is faulty, it won’t signal the gas valve to open, and the pilot light won’t stay lit. Replace the thermocouple if necessary.
Gas valve issues: If the gas valve is faulty, it won’t allow gas to flow to the burner, and the pilot light won’t stay lit. Contact a professional plumber in San Jose to repair or replace the gas valve.
If you’re unable to resolve the pilot light issue, or if you detect a gas leak, it’s crucial to seek assistance from a professional plumber without delay. A licensed plumber will be able to diagnose and fix any issues with your gas water heater safely and effectively.
Post views: 733

